Knowing how to use Git is incredibly important for all developers, whether you’re building a simple HTML/CSS website or making your own operating system. Git allows you to quickly implement version control into your project, but a lot of people–especially developers first starting out have a hard time grasping what exactly Git is and how to use it. But before we even get to using Git, we have to install it first, which for some people, can be a challenge all on its own.
Git is relatively simple to install. Because I use OSX, that’s what this tutorial will be focused around. Here’s what I’m working off of at the time of this tutorial:
OSX Yosemite 10.10.4
Git 2.4.3
There are guides out there that address installing XCode at the same time as you install Git and guides that show you how to install Git through GUI’s and Tools such as Boxen or Homebrew. Those tools are awesome, but sometimes, they cause even more confusion for beginners. This guide assumes that you want to install Git without installing XCode, or if you already have XCode installed, you don’t want the Command Line tools, and just want to install plain old Git without the use of Tools or installing anything else. So let’s get started.
Installing Git on OSX
Step 1: It goes without saying that the first thing you need to do is to actually get Git and you can download it for free on Git’s website. The latest version for your operating system should be available on their homepage: git-scm.com.
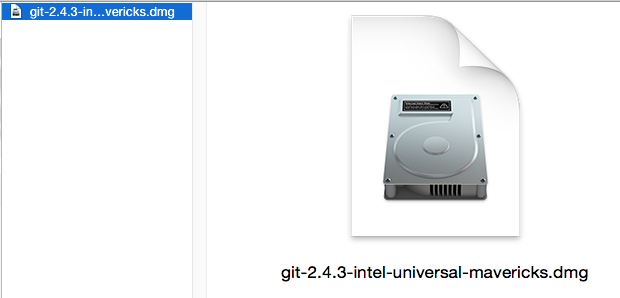
Step 2: The downloaded file should a dmg file if you’re installing Git on OSX. You’ll want to double-click on the dmg file to begin the installation process. At the time of this writing, I have the Mavericks version which should work fine for Yosemite as well.
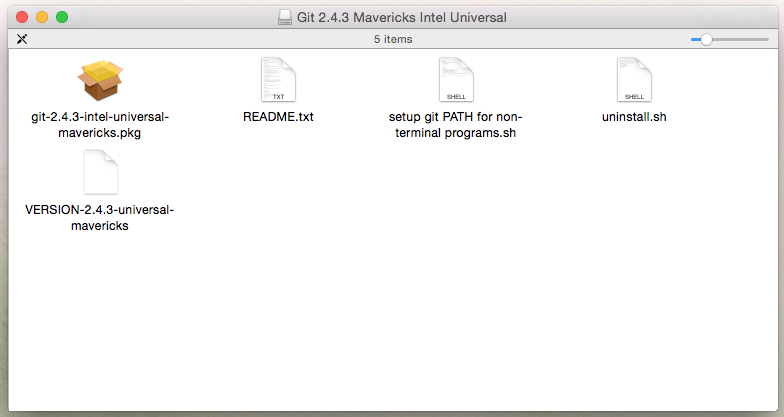
Step 3: Now, unlike most dmgs that you’re probably used to installing, this process requires a little more manual effort. After you click on the dmg, it will mount the Git installation file and present you with the following:
Step 4a: You want to doubleclick on the .pkg file (in this case, git-2.4.3-intel-universal-mavericks.pkg) to actually start the installation:
If the installation starts, head on down to Step 5. If you get a warning message about not being able to open the file, see Step 4b.
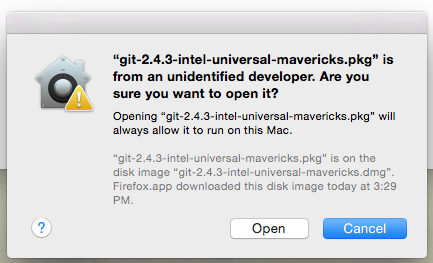
Step 4b: Depending upon your security settings, you may get a warning that it can’t be installed because it’s from a third party developer. That warning might look like this:
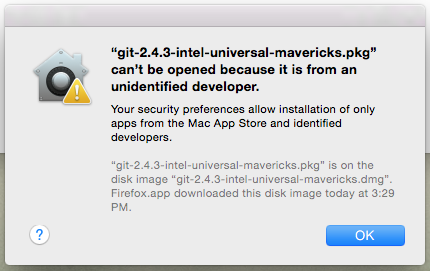
If you get that warning, hold down the CTRL key on your keyboard then right-click on the .pkg file and select Open. That will open a different warning dialog that includes an “Open” button this time which will then allow you to run the .pkg file and continue with your installation. In the backend, doing this will also add an exception for the app you’re attempting to install to your security settings. Once it does this, you should be able to just double-click on the app in the future should you need to reinstall it again:
There are other ways to change your security settings to allow you install apps without getting the warning message. For instance, you can go into System Preferences > General then click on the Lock in the lower left corner, enter your administrative password and under “Allow apps downloaded from”, you check “Anywhere”. This will allow you to install any app regardless of where you got it and if the developer is unidentified, but if you just want to allow Git for now without allowing all other apps, the above technique is a quick way to achieve that.
Step 5: Git will open up the standard OSX installation dialogs from here where you will be able to select the installation type and then proceed to actually install it onto your computer:
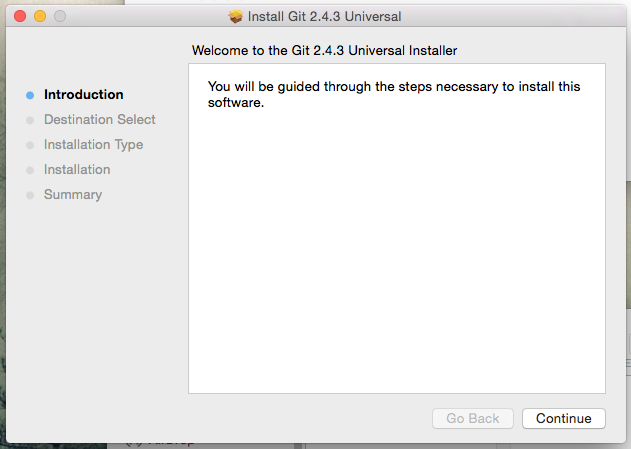
There is a Custom Install option, but it’s generally recommended to just go with the Standard Install. This step should be relatively straightforward. Once finished, you should see this:

Verifying the Installation & Dealing with Wrong/Outdated Git Version
Like all installations we do, we probably want to verify that everything went off without a hitch. We’re going to verify Git by going through Terminal. A lot of the work developers do involve getting used to the Terminal so if you were afraid of it before, it’s time to get to know it a bit better because you’ll be working with it a lot. Now, this guide assumes that you are totally new to Terminal.
Step 6: Let’s open up Terminal. If you don’t have terminal mounted on your Dashboard, go to Applications > Utilities to find it:

Step 7: If you followed my SASS Installation Tutorial, you might be familiar with how we’re going to check for Git; we’re going to ask it for its version number. Within Terminal, type this: git –version, then hit enter/return on your keyboard.

Step 8a: You should get the version number that you installed, which at the time of this writing, should be 2.4.3. If you do get your latest version to show up, go to Step 9. Otherwise, if you have an older version show up, head on over to Step 8b.
Step 8b: Now, not content with being simple, those of you who have XCode installed, you may already have a version of Git pre-installed on your machines. That version is very likely to be outdated. Here’s what happened when I requested Git’s version:

Obviously, that’s not the version I downloaded and installed. This is because my computer is currently using the Git that came with XCode’s Command Line tools. You can check if this is the case with you, by typing: which git into Terminal. Once you run which git, if it returns “usr/local/bin”, you’re using XCode’s version of Git. That means we’re going to have to take a couple of extra steps to get to the actual latest version of Git. And if you’re finding yourself in the same boat, here’s how you get to the newest version of Git that you installed. Type this into Terminal:
export PATH=/usr/local/git/bin:$PATH
Hit enter on your keyboard then type this:
source ~/.bash_profile
Now if you check the Git version again: git –version. You should get the accurate version. You’re not done yet, though. Exit out of Terminal by typing: exit, then close out of it completely. Now, reopen Terminal and try checking the Git version again. If you still get the latest version, you’re good to go to Step 9.
If you’re still experiencing issues getting the proper version of Git after restarting Terminal. Or if the new version didn’t appear even after typing in the path above, head to Step 8c.
Step 8c: If you’re still having problems getting the latest version of Git, you may need to update the PATH to override XCode’s version of Git. What we’ll do is override the path that Terminal is getting the old Git version through. To do that, we’re going to declare a path to the newest version of git and write it into our bash_profile file. bash_profile is typically a hidden file on OSX that holds user set preferences. Within Terminal, type in the following (courtesy of Chris Chernoff at BurnedPixel):
echo “export PATH=/usr/local/git/bin:/usr/local/bin:/usr/local/sbin:$PATH” >> ~/.bash_profile
Hit enter and then type in this and hit enter again:
source ~/.bash_profile
What we’re doing is telling Terminal to reference the file we wrote the new Git Path into above, instead of whatever XCode has preset. From here, we can check Git’s version to see if we finally have the new version. But to make absolute sure we’re getting the latest Git version, exit then close out of Terminal. Then start Terminal up again and try getting the Git version again: git –version. You should see the latest version. Now type this in: which git, you should see “/usr/local/git/bin/git”.This is where you want to be.
If you were wondering what the ~ stands for, it is a shorthand way of referencing the home directory. Now you can finally move on to Step 9 and setting up GitHub.
Setting Up GitHub
Step 9: You’ll need a GitHub account first and can sign up for one here: github.com. There are free accounts, low cost, pro accounts all the way up to enterprise. For now, just get a free account. It will give you access to the majority of GitHub’s features and provide you with one private repository.
Step 10: Type in the following: git config –list. You will be shown a list of configurations for your Git installation. If you’re using GitHub (and you should), the first thing you might want to do is edit your username and email address so people working with your projects or looking at them knows who they belong to. To change the username and email, type in this:
git config –global user.name “your name“
git config –global user.email “[email protected]“
You’ll want to replace the italicized ‘your name’ and ‘[email protected]’ with your own credentials. You can use whatever user name you want, from your real name, to your business name, to a nickname you prefer. However, your user email must be the same user email that you used to sign up for GitHub. Keep the double quotes when you type in those commands too. When you’re done, you can check out your config list again to see the changes you just made. If you mess up setting up your user name or email, you can check to make sure you actually have an issue by typing: git config –get-all user.name or git config –get-all user.email. If you typo’d your first value, you may have typed it up a second time thinking one might overwrite the other and actually end up with two values instead. If you happen to see two values displayed like so:

Type this in to replace the value and resolve the issue:
git config –global –replace-all user.name “your name”
The same goes for fixing two values for your user email:
git config –global –replace-all user.email “[email protected]”
Step 11a: I doubt the thought of entering your username and password each time you need to send something to GitHub sounds very appetizing. So let’s automate that process so we can streamline this process a bit. Type in the following:
git credential-osxkeychain
You should get a generalized usage message back that looks like this:

If you didn’t get the message above, you will need to install the Credential Helper. To do this head on to Step 11b. If you got the above message, go to Step 12.
Step 11b: Let’s install the Credential Helper. You’ll need to type in the following commands in order, hit enter after every command to execute it:
curl -s -O http://github-media-downloads.s3.amazonaws.com/osx/git-credential-osxkeychain
chmod u+x git-credential-osxkeychain
sudo mv git-credential-osxkeychain \ “$(dirname $(which git))/git-credential-osxkeychain”
(you will be asked for your administrative password for your computer at this point, type it in and hit enter to continue)
git config –global credential.helper osxkeychain
Finally at this point type in git credential-osxkeychain again and you should get the usage message from Step 11a.
Step 12: OK, let’s test all of this to make sure it works by performing a commit to our GitHub account. Log into your GitHub account and create a new Repository. On GitHub, you should see a link on the welcome screen after you log in to create a new repository. If this is a brand new account, you will also have a giant image at the top telling you to create a repository.

Once on the repository creation screen, give your repository a name (I named mine testcommit). You will use this name to send your commits using Terminal so keep it short, meaningful and memorable. Also keep in mind that you can’t have spaces or special characters in the name. You can also set your repository to public or private. I’m going to make a public repository for this tutorial, and if you’re following along looking to make your first test commit and have just a free account, a public repository is probably the way to go for now.
Finally, leave the “Initialize this repository with a README” unchecked. All repositories require a readme file which tells others what the repository is for. We’re going to generate our own README file within Terminal. Now, create the repository and let’s do our first commit.
Step 13: When you send your file to a GitHub Repository, you are “committing” it. This means that you are sending it from your local drive onto GitHub. All of this is done within Terminal so let’s head back there and type this in:
mkdir ~/testcommit
Mkdir stands for “make directory”, we are essentially making a /testcommit directory. Now after we make it, let’s actually move into it. Type this:
cd ~/testcommit
You should be inside the folder ‘testcommit’ now. Let’s initialize Git, type this in:
git init
You should get this message: “Initialized empty Git repository in /Users/computername/testcommit/.git/”. Computer Name is where your computer’s name would be, and testcommit is the directory you created. The last part means you’ve initalized git within that directory. What we’ve just done is create a directory on our computer and made it possible for files within that directory to be committed to GitHub. In fact, if you navigate to Users/computername/testcommit within your file explorer, you should be able to locate it pretty easily.
Step 14: We need a test file to send to our new GitHub repository now. Open up a text editor or code editor and create a sample file. You can put whatever you want it in, or if you’re feeling super lazy, you can download a file I set up here: GitHub Commit Test File (HTML)
Step 15: Throw your file into your testcommit folder that you created on your computer. Let’s finally commit this thing. Type this in:
git add commitfile.html
We are essentially telling Git that we want to add that file to the repository. Now, we haven’t yet gotten our file into our GitHub repository, to do that, we need to push it. Type this into Terminal:
git remote add origin https://github.com/yourusername/testcommit.git
We’re moving into our GitHub repository and getting ready to push files to it up there.
Step 16: Before we can send our files up, we need to make sure our local directory is up to date, otherwise Git will throw an error telling us that we have to pull before we push. First thing’s first, let’s commit. Type this:
git commit -m ‘my very first commit’
We’re telling Git that we’re committing up there. The -m means that what follows (‘my very first commit’) is a message that we’ll be including with our commit. Now, pull the directory by typing this:
git pull origin master
It will pull your GitHub directory and make sure what you have in your local drive is the latest iteration. Now, we’re finally read to push. Type this in:
git push origin master
Once you run that command, your file will be sent over to GitHub and placed into your repository. Check it out in your account on GitHub and you should see your files sitting pretty there.
Before I let you go, one command that you’ll find extremely helpful because I’m positive everyone is going to do this is the remove local repository command. At some point, someone is going to accidentally create a git repository in Terminal in a place they didn’t mean to make a repository. Here’s how you delete it. Go into Terminal, navigate to the directory you accidentally created a repository in by using cd (ex. cd ~/Library) then type this up:
rm -rf .git
Doublecheck that you deleted the repository by typing this:
ls -lah
This will show you all the files, folders and hidden files and folders in the directory you are currently in. If you don’t see a .git file, you’re good to go.
All right, we’re finally done setting up Git and GitHub and we made our first Commit too. This is by far, one of the more complicated tutorials I’ve done because of how many things can go wrong during installation. And I doubt very much that I covered all the bases here. I am far from a GitHub expert and it’s highly possible I missed something or something has been depreciated since I posted this. If you encounter an error or problem setting up Git or GitHub, the very best place to look for help is StackOverflow. Compared to practically all of the people on there, I am a Git Greenhorn.
If you’re looking to do more things with GitHub, this Documentation: Git Reference has pretty much everything you need.
Resources
Git Reference
Burned Pixel, Setting Up Git and GitHub
GitHub Help